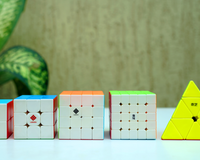
While most cubers start with puzzles like the 2x2, 3x3, and 4x4, you will often see the Pyraminx being recommended as a puzzle that is easy for beginners to solve. However, contrary to other puzzles for those starting out, it has a rather confusing and intimidating shape. This should not frighten you! With a solid understanding of how the puzzle functions, it becomes very fun and, quite frankly, intuitive to solve, making it all the more enjoyable! Let’s begin!
The first thing you need to know is Pyraminx notation. There are four different types of moves that can be done on the Pyraminx, with each being around the axis of one of the four corners, which can be denoted like so:

As you can see, U denotes the Up corner, R denotes the Right corner, Left denotes the Left corner, and B denotes the Back corner. For all these notations, a normal clockwise turn can be done, represented by the letter of the turn type (e.g. U), and an opposite counterclockwise turn can be done, denoted by the letter of the turn type followed by an apostrophe (e.g. U’).
Now that we have covered the notation for Pyraminx, let’s learn how to solve it. The first point to keep in mind is that this is a layer-by-layer method, which means we are starting from the bottom of the two-layer puzzle and working our way upwards, similar to the layer-by-layer 3x3 method. Now that we have done a basic overview of the method, we must move on to the types of pieces on the Pyraminx.

*Keep in mind that ‘corners’ are commonly referred to as ‘tips’.
The first step is to solve all the tips on the puzzle. This is a fairly straightforward process, as the tips cannot move from their designated position on the Pyraminx and simply have to be twisted on their axis until they are solved.
Recommended Read - How To Solve Pyraminx Fast
The second step is to align all the centers of one color on a side. This can be done by choosing one of the four colours (red, yellow, green, or blue) and doing full layer turns to align them on one side. Keep in mind that because the centers will always stay on their axis, there is only one side on the Pyraminx that can hold all three centers, so some trial and error will go into identifying the side where all three centers can be aligned.
The third step is to insert the edges that have the colour of the centers aligned in the previous step into the bottom layer to complete the first layer. This is to be done using insertions that do not disturb the centers placed in the bottom layer.

The fourth step is to solve the last layer of the Pyraminx. This is a slightly more complicated step, requiring more of the notation discussed earlier in this blog. For all the algorithms and when to use them, go to the time 1:34 on the reference video. Keep in mind that some of the algorithms look somewhat similar and have similar algorithms, so confusing them initially is to be expected and should not discourage you! Just keep pushing forward and relearning the cases, and you will eventually be able to identify and solve every last layer case!
And that’s it! Can you believe it? Solving the Pyraminx really is quite simple, as long as you put in the effort to learn the notation and the few algorithms needed to solve the puzzle. Thank you so much for reading this blog post, and any other information you want on how to solve the Pyraminx can be found on the reference video!
-- Naren Ramesh, Team Cubelelo


