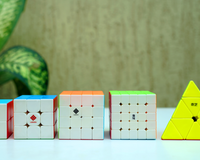
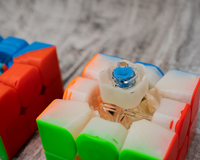
Magnetic cubes are on fire in the marketplace today. There has been a mass-produce of magnetic cubes from popular and widely used brands like GAN, MoYu, etc. It also seems like many top speedcubers prefer to use magnetic versions of their mains and also magnetic 4x4 and 5x5.
In this article, we take a look at easy ways to magnetize any cube. However, we shall first understand what is meant by magnetizing a cube. Making a magnetic cube or magnetizing a cube includes glueing neodymium magnets (available for purchase on the official Cubelelo website) inside the cube, so they attract when no partial turns have been made. In simple terms, for a 3x3 this means glueing a total of 48 magnets inside the cube – three for each corner and two for each edge. Adding neodymium magnets give a very subtle yet fulfilling feel to the cube. It makes the cube more stable while smoothening corner-cutting and other attributes of the cube.
3 Steps To Magnetize A Cube
Before we get started, you need to get all the materials together - the cube, the neodymium magnets, tweezers (if you have any) and super glue. You need to identify which kind of neodymium magnets you need. There are three kinds of neodymium magnets to choose from – N45, N35 and N42. You can choose from either of these based on the kind of strength you need – weak, subtle, strong and stronger.
Once you have decided on the strength of the magnets, you need to now choose the size. There are a few variations of the sizes available –
- N35: 2mmx2mm, 3mmx1mm, 4mmx1mm, 4mmx1.5mm and 4mmx2mm.
- N45: 4mm x 1.5mm and 5mm x 1mm
- N42: 4mm x 1.5 mm and 4mm x 1mm
You would ideally need 48 magnetics for a 3x3 cube. Therefore, buying a pack of 50 from Cubelelo is a great idea.
Now that you have all the materials in place let’s take a look at the steps to magnetize your cube.
Step 1: Select A Cube And Disassemble It

Different cubes have different methods of disassembling them. Whether you are creating your own magnetic cube as a DIY project or changing the magnets of a magnetic cube, you need to first understand how it disassembles.
Step 2: Determine The Placement Of The Neodymium Magnets
Generally, you are required to place three magnets on the corner pieces and two on the edges. The magnet placement is quite an easy task. For the edge piece, you need to place the magnet relative to the corner. You should put one magnet on the bottom of the edge piece and one on the top.
While you are doing this, you should keep in mind the polarity of the magnet. As you would already know that opposites attract and similar repel. Therefore, you should carefully place your magnets relative to each other so that they attract and not repel.
Once you have placed the magnets correctly, experiment and move the layers around to ensure the same.
Step 3: Glue The Magnets And Assemble The Cube.

Once you feel that the polarities are correct, you can glue the magnets. You need to do this step carefully as any displacement of the magnets, or the wrong polarity can lead to changing the polarities of all the magnetics. Therefore, you can start by glueing one magnet and then place it correctly using the tweezers. It is quite time-consuming, but this is the most crucial step of magnetizing your cube.
Once you have glued up all the magnets and placed them correctly, let it sit for some time until the glue dries up completely.
Summing it up!
A cube will always need some good tensioning, lubing and magnets that are precisely placed for a smooth experience. Give it a go and experiment with your cube! You can buy all the materials, cubes and the accessories from the official Cubelelo website!


8 comments
LEO
BTW CAN U PLZ SELL CORE MAGNETS, I RLLY WANNA CUSTAMIZE MY DRIFT 3M MAGLEV PRO
LEO
hiruja
yooooooo cooooooool
Rajesh Newar
👍 nice
Best method
Neeraj Sah
Thanks
K.surya .
I can’t understand so play as video
Ayush
Thanks for explaining it in detail.
Mohammad Rehan
I know how to magnetize the cube, but I have read it.